Polo Shirt Quality Control Checklist for Buyers
Table of Contents
Ordering custom polo shirts is not only about approving the right fabric, color, and logo. Buyers also need to make sure the approved specifications are consistently followed during bulk production.
At Mingxingpolo, we recommend checking polo quality at several stages rather than relying only on a final inspection. Fabric shade, garment measurements, collar shape, placket alignment, embroidery position, stitching, labels, and packaging can all affect the final result.
This checklist explains what buyers should review from incoming materials through final packing, especially when sourcing custom polos for brands, corporate programs, golf collections, teams, or wholesale orders.
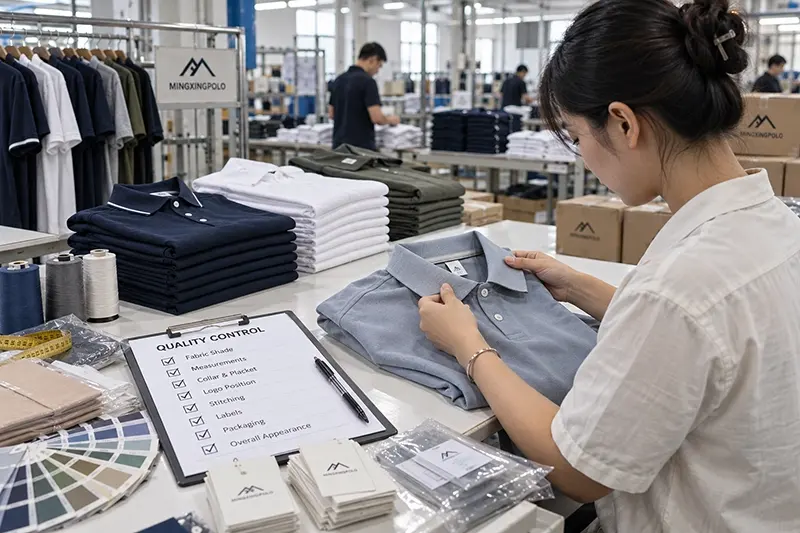
Why Polo Shirt Quality Control Should Start Before Final Inspection
A final inspection can identify problems, but it cannot always correct them efficiently.
For example, if an embroidery position is wrong across an entire production run, discovering it after all garments have been completed creates a much larger problem than identifying it during early production.
The same applies to fabric shade differences, incorrect measurements, collar construction, labels, and packaging.
For custom polo production, quality control should therefore follow the order through several stages:
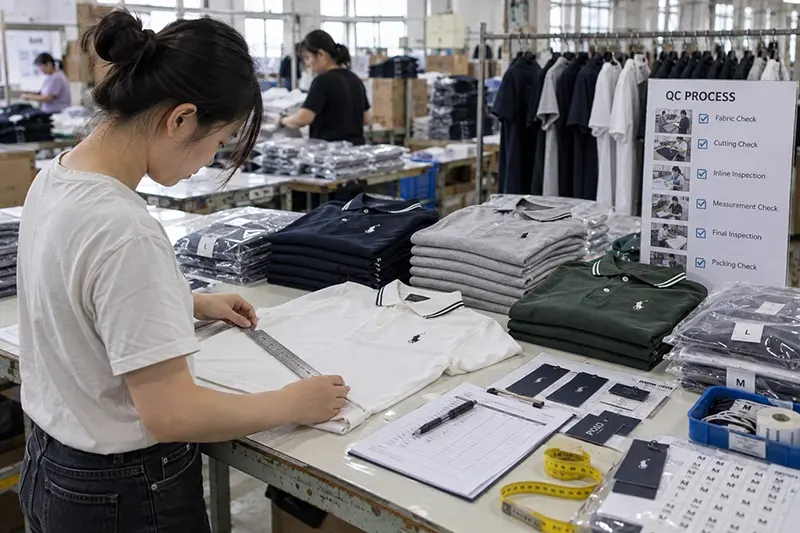
Incoming Materials → Cutting → Inline Sewing → Measurement & Appearance → Final Inspection
The approved sample, size specification, Pantone reference, logo artwork, labeling requirements, and packaging instructions should remain the main production references.
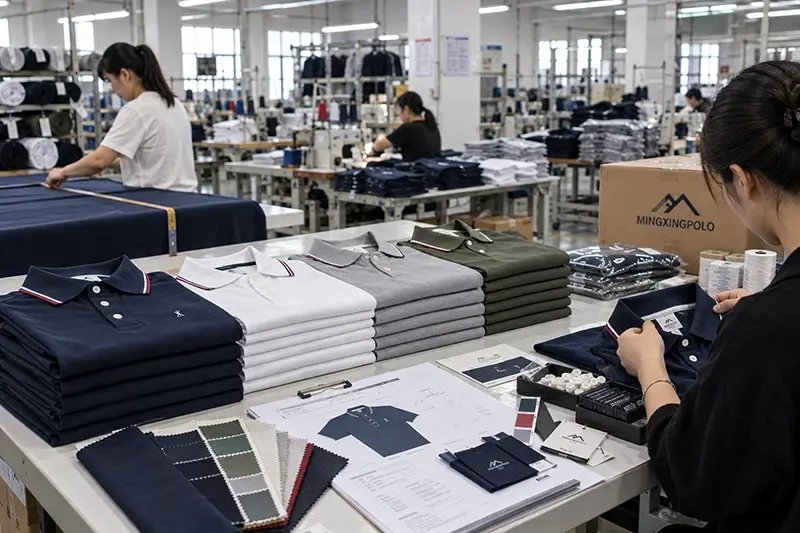
1. Check Fabric Before Cutting
Fabric inspection is one of the first quality-control steps because fabric problems can affect the entire order.
Buyers should confirm:
- Fabric composition
- Fabric weight / GSM
- Color and shade
- Surface appearance
- Stretch and recovery where required
- Hand feel
- Fabric width
- Shrinkage performance
For pique polos, also look at the consistency of the knit structure. Uneven surfaces, visible defects, or noticeable shade variation can become more obvious after the garment is assembled.
When several fabric rolls are used for one color, shade consistency becomes especially important.
For performance polos, additional properties such as moisture management, stretch, and dimensional stability may also need to be checked.
If you are still deciding between cotton pique, polyester pique, blends, or stretch fabrics, fabric selection should be confirmed before sample approval and bulk production.
2. Confirm Color Against the Approved Standard
Do not evaluate bulk color only from a phone photo or computer screen.
Color should be compared against an agreed physical or standardized reference whenever possible, such as:
- Approved fabric swatch
- Approved sample
- Pantone reference
- Lab dip
Lighting also matters. The same navy, black, grey, or branded corporate color can appear different under different light sources.
For repeat orders, keeping an approved production reference is particularly useful because buyers often expect the new batch to remain close to previous production.
Minor manufacturing variation may occur, but acceptable color tolerances should be established before production.
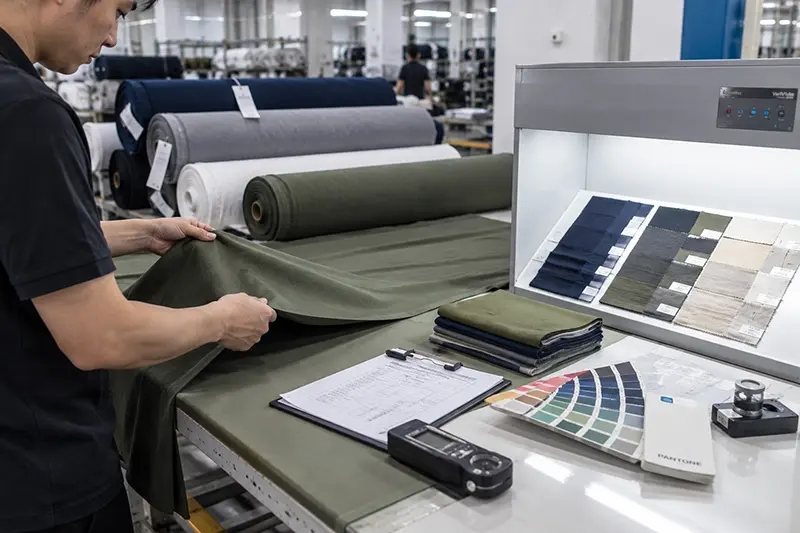
3. Check Cutting and Fabric Direction
Once fabric passes inspection, cutting accuracy becomes important.
The factory should verify that:
- Correct patterns are being used
- All required sizes are included
- Fabric direction is consistent
- Panels are correctly identified
- Stripe or pattern alignment is controlled where applicable
- Cutting quantities match the production plan
Poor cutting can create measurement problems later, even when sewing itself is correct.
This is particularly important for polos with fitted silhouettes, stretch fabrics, engineered designs, or detailed size grading.
4. Inspect Collar and Placket Construction
The collar and placket are among the most visually important areas of a polo shirt.
A buyer should check:
Collar Shape
The collar should sit evenly without excessive curling, twisting, or distortion.
Collar Symmetry
Both sides should appear balanced when the garment is laid flat or worn.
Placket Alignment
The placket should remain straight and centered.
Placket Length
It should follow the approved specification consistently.
Button Position
Buttons and buttonholes should align correctly.
Collar-to-Neck Seam
Construction should be clean without unnecessary puckering.
These details strongly influence whether a polo looks clean and retail-ready, particularly for classic, corporate, and premium collections.
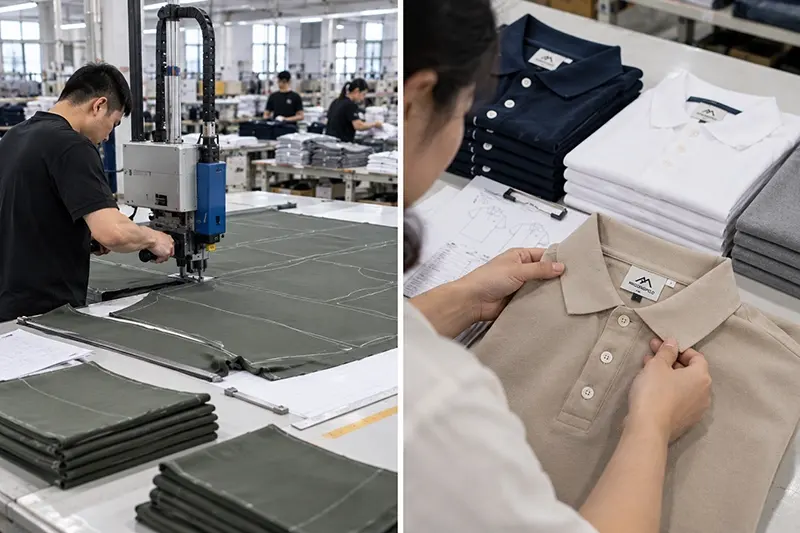
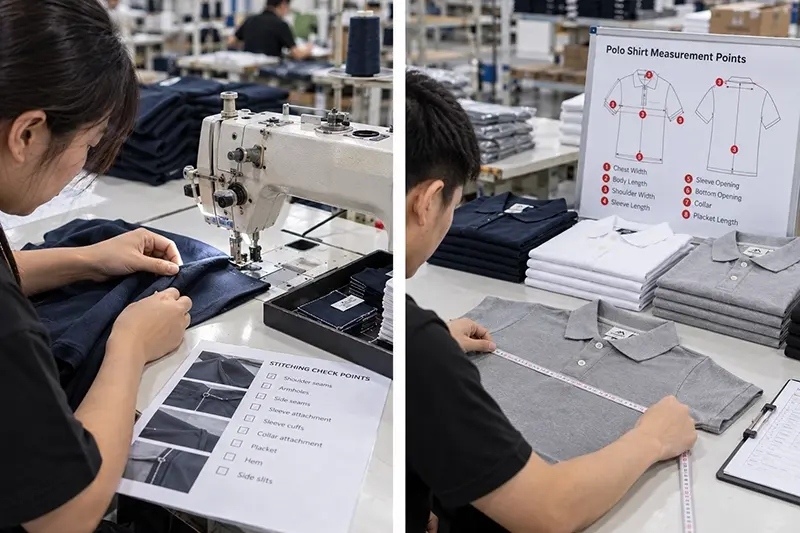
5. Check Stitching and Garment Construction
Good stitching is not simply about having small stitches.
The factory should inspect whether the construction is appropriate and consistent.
Important areas include:
- Shoulder seams
- Armholes
- Side seams
- Sleeve attachment
- Sleeve cuffs
- Collar attachment
- Placket
- Hem
- Side slits
Look for skipped stitches, loose threads, broken stitching, seam puckering, uneven stitching, open seams, or visible tension problems.
Stress areas should also have adequate reinforcement.
For buyers developing a new style, these construction details should already be established during polo development and sampling so that bulk QC has a clear approved standard.
6. Measure Finished Polo Shirts Against the Size Chart
A polo can look good visually and still fail the approved measurements.
Measurements should therefore be checked separately.
Common measurement points include:
| Measurement Point | What to Check |
|---|---|
| Chest Width | Overall garment width and fit |
| Body Length | Front/back length according to specification |
| Shoulder Width | Balance across upper body |
| Sleeve Length | Consistency between sizes |
| Sleeve Opening | Comfort and cuff proportion |
| Bottom Opening | Garment silhouette |
| Collar | Neck and collar proportion |
| Placket Length | Consistency with approved sample |
The exact measurement points depend on the style.
A factory should not simply compare every garment with one sample. Bulk measurements should follow the approved size specification and agreed tolerances.
This becomes particularly important when producing multiple sizes from XS through larger sizes.
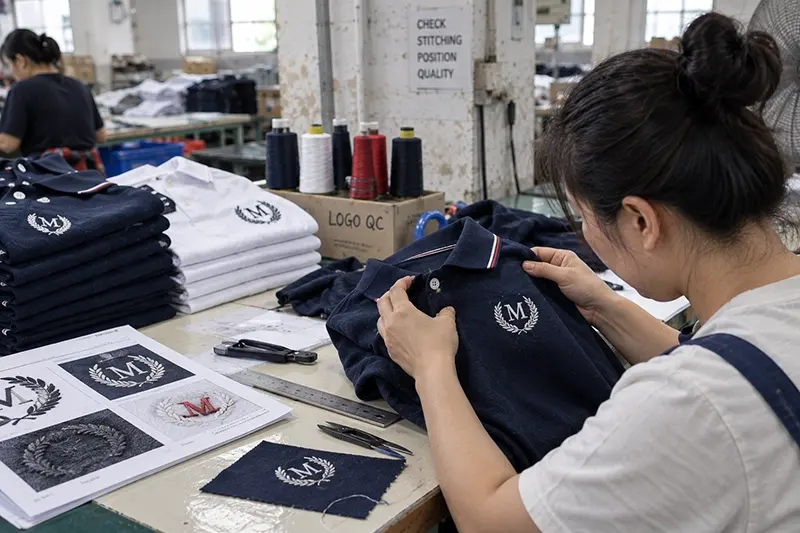
7. Inspect Embroidery and Printed Logos
Brand decoration deserves its own inspection rather than being treated as a minor finishing detail.
For embroidery, check:
- Artwork shape
- Thread color
- Logo dimensions
- Placement
- Stitch density
- Clean edges
- Fabric puckering
- Backing
- Loose threads
A logo that looks good on a computer may behave differently when embroidered onto pique fabric. Stitch density, backing, fabric weight, and logo size all interact.
For printing, check:
- Artwork dimensions
- Print position
- Color
- Opacity
- Edge definition
- Surface finish
- Adhesion
- Fabric distortion
Performance polyester may require additional attention to dye migration depending on the fabric and printing method.
The approved logo sample should remain the reference during bulk decoration.
8. Check Labels and Private Branding
A perfectly sewn polo can still become unusable for a brand if the wrong labels are attached.
Check:
- Main neck label
- Size label
- Care label
- Country-of-origin information where required
- Brand spelling
- Label position
- Label orientation
- Hang tags
- Barcode or SKU information where applicable
For orders with multiple sizes, particular attention should be paid to matching the garment size, sewn size label, hang tag, barcode, and packaging identification.
This is especially important for private label polo shirts intended for retail or distribution.
9. Review Overall Appearance
After individual construction points have been checked, inspect the polo as a complete garment.
Lay it flat and, where appropriate, evaluate it on a mannequin or fit model.
Look for:
- Overall symmetry
- Collar balance
- Placket position
- Sleeve balance
- Garment shape
- Fabric defects
- Visible stains
- Pressing marks
- Loose threads
- Logo position
- Uneven hems
- Twisting
This step catches issues that individual measurement checks may not reveal.
A garment can technically remain within measurement tolerance while still looking visually unbalanced.
10. Consider Wash Testing Before Shipment
Wash testing can help reveal problems that are difficult to identify from a newly finished garment.
Depending on the product and buyer requirements, checks may include:
Shrinkage
Does the garment remain within the agreed dimensional standard?
Colorfastness
Does the fabric maintain acceptable color performance?
Collar Recovery
Does the collar retain its shape?
Twisting
Do the body and side seams remain balanced?
Logo Durability
Does embroidery or printing remain stable?
Surface Appearance
Does the fabric show excessive pilling, distortion, or other unwanted changes?
Testing requirements should be agreed according to the fabric, intended market, and product specifications rather than assuming every polo needs exactly the same test protocol.
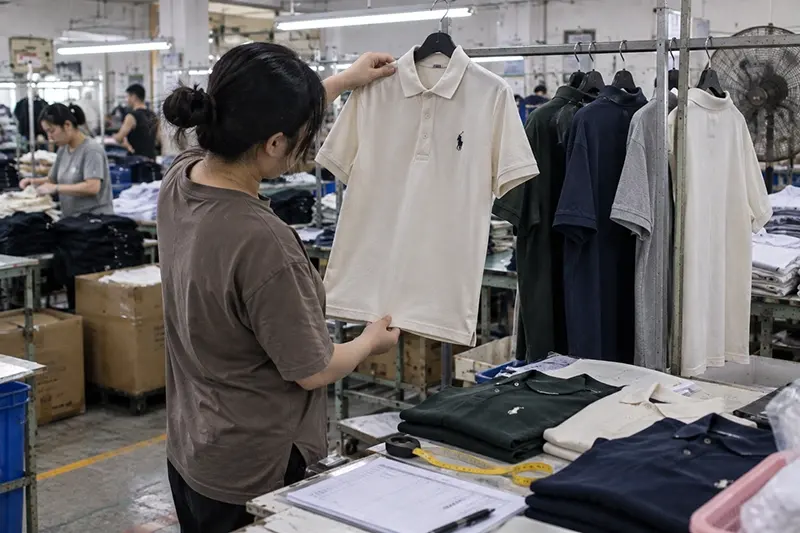
11. Complete a Final Inspection Before Packing
Final inspection is the last opportunity to confirm that finished goods match the approved requirements.
At Mingxingpolo, the final inspection stage focuses on the completed garment and confirmed order specifications.
Buyers should expect checks covering:
- Appearance
- Measurements
- Workmanship
- Fabric condition
- Color
- Collar and placket
- Logo
- Labels
- Size identification
- Quantity
- Packaging requirements
Any identified issue should be evaluated before the goods are released for shipment.
Final QC should confirm earlier production controls—not replace them.
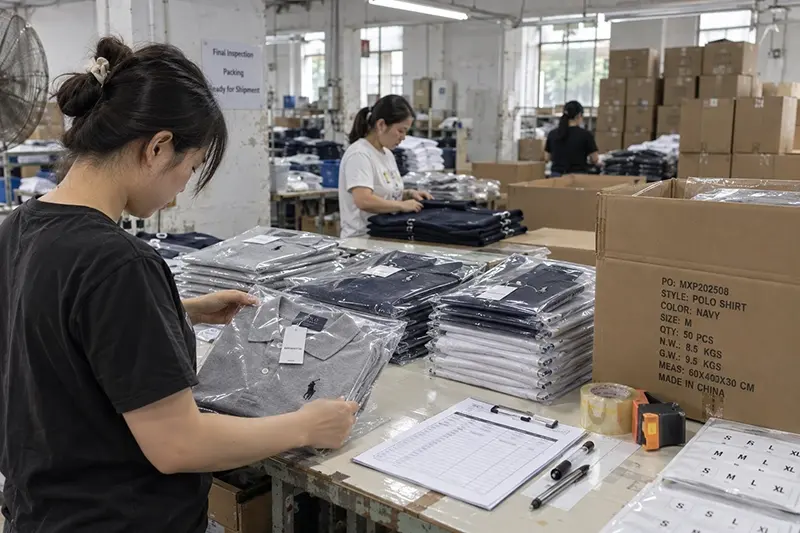
12. Verify Packaging and Carton Information
Quality control does not stop when sewing is finished.
Before shipment, confirm:
Folding
Garments are folded according to the agreed presentation.
Individual Packaging
Correct polybags, branded bags, tissue, or other requested packaging are used.
Size Identification
Sizes can be identified correctly without opening every package.
Quantity
Packing quantities correspond with the order.
Carton Marks
Shipping marks, PO information, destination details, or other requested identification are correct.
Carton Condition
Cartons should be suitable for international transportation.
Incorrect packing can create significant problems for warehouses, distributors, corporate programs, and retail brands even when garment quality itself is acceptable.
A Simple Polo QC Checklist for Buyers
Before approving shipment, buyers can use this shorter checklist:
| QC Area | Confirm |
|---|---|
| Fabric | Composition, GSM, shade and appearance |
| Color | Matches approved reference |
| Measurements | Within agreed tolerances |
| Collar | Shape, symmetry and recovery |
| Placket | Straight, balanced and correct length |
| Stitching | Clean and secure |
| Logo | Correct color, size and placement |
| Labels | Correct content, size and position |
| Appearance | Clean, balanced and defect-free |
| Packaging | Correct bag, size marking and carton |
| Quantity | Matches confirmed order |
This does not replace a detailed product specification, but it gives buyers a practical overview of the main areas that should be controlled.
When Should Buyers Check Quality?
One of the biggest mistakes is waiting until production is finished.
A more effective approach is:
Incoming Material Inspection
Check fabric, color, trims, and other materials.
Cutting Check
Confirm patterns, sizing, fabric direction, and quantities.
Inline Sewing Inspection
Identify construction problems while production is still running.
Measurement & Appearance Inspection
Confirm size specifications and visual consistency.
Final Inspection
Review finished garments, branding, quantity, and packaging before shipment.
At Mingxingpolo, these checkpoints help maintain consistency from the approved sample through bulk production.
Final Thoughts
A good polo shirt quality-control system is not based on one final inspection. It begins with approved specifications and continues through fabric inspection, cutting, sewing, measurement, branding, finishing, and packing.
For buyers, the most important step is to establish clear standards before bulk production begins. Keep the approved sample, size chart, fabric reference, logo specifications, label files, and packaging requirements as the basis for inspection.
If you are developing a custom polo collection, contact us with your design, quantity, size requirements, fabric preference, logo artwork, and target delivery date. Our team can support sampling, bulk production, quality control, private labeling, packaging, and shipment preparation.
FAQs
Should I inspect every polo shirt in a bulk order?
Not necessarily. Inspection methods depend on order size, buyer requirements, product risk, and the agreed QC standard. Critical specifications should be monitored during production, while finished orders may use an agreed sampling inspection method.
What measurements should I check on a polo shirt?
Common points include chest width, body length, shoulder width, sleeve length, sleeve opening, bottom opening, collar dimensions, and placket length. The exact measurement list should follow the approved style specification.
Why can bulk polo measurements vary slightly?
Garment production involves fabric behavior, cutting, sewing, pressing, and finishing, so small variations can occur. Buyers and manufacturers should agree on measurement tolerances before bulk production.
Should embroidery be checked before bulk production?
Yes. Logo size, thread color, placement, stitch density, backing, and the effect on the actual polo fabric should be approved before full bulk embroidery proceeds.
How does Mingxingpolo control bulk polo quality?
We use multiple inspection points covering incoming materials, cutting, inline sewing, measurements and appearance, and final inspection. The approved sample and confirmed production specifications are used as references throughout bulk production.
Share With
Related Articles



Hot Products